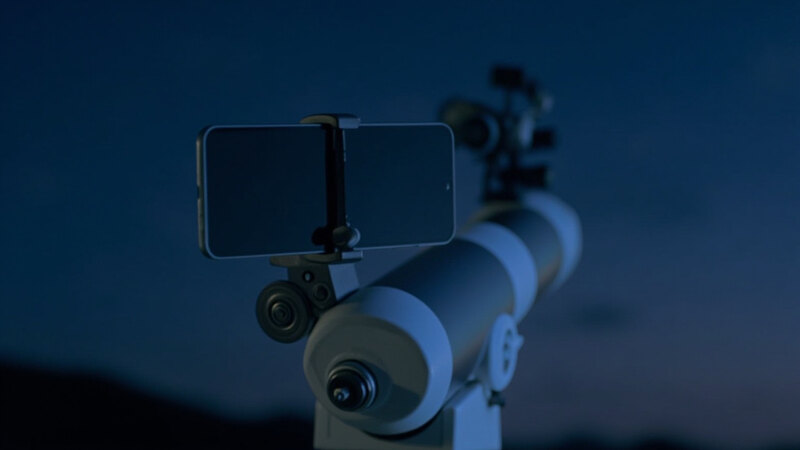
Smartphone Astrophotography Through a Telescope
A phone can sit on a telescope and take the picture. How even the frame comes out starts with two pupils matching. Take the reference scope on this page: a 25 mm eyepiece on 1,200 mm runs at 48× and throws a 4.23 mm exit pupil. The phone in our worked example accepts a 4.06 mm entrance pupil. Those two numbers set how evenly the lit part of your frame is lit, and the eyepiece's field stop sets where the lit part ends.
This page is about smartphone astrophotography through a telescope you already own, and the targets are the Moon and the planets. The method is arithmetic first: pupil match, then field, then exposure, then focus. Every number below can be rebuilt from the formulas listed in the Sources.
- Telescope
- 203 mm (8 in) Dobsonian, 1,200 mm focal length, f/5.9
- Eyepiece
- 25 mm Plössl, 1.25 in barrel, 52° apparent field
- Magnification
- 48× (1,200 ÷ 25)
- Exit pupil
- 4.23 mm (25 ÷ 5.9)
- True field
- 1.08° (52 ÷ 48)
- Phone
- Xiaomi 14 main camera, 23 mm equivalent, f/1.6, 1/1.31 in sensor
- Actual focal length
- 6.49 mm (23 × 12.21 ÷ 43.27)
- Entrance pupil
- 4.06 mm (6.49 ÷ 1.6)
- Sky field on the diagonal
- 1.80° at 48× (86.5 ÷ 48)
- Image scale
- 1.59″ per pixel (206.265 × 2.4 ÷ 6.49 × 48)
- Mount
- manual alt-az, with a phone adapter clamped to the eyepiece
Our assumptions: a 52° apparent field on the 25 mm Plössl, a 4:3 sensor frame, and the phone's main camera at its widest setting. Sensor diagonal 12.21 mm from the 1/1.31 in type name; the same sensor measures 9.80 mm × 7.35 mm from 12.5 MP at 2.4 µm. Phone listing read 2026-11-06.
The exit pupil decides how much of your phone frame is lit
Three numbers decide the rest, and all three come from formulas rather than from labels. The exit pupil is the eyepiece focal length divided by the focal ratio: 25 ÷ 5.9 = 4.23 mm. The true field is the apparent field divided by the power: 52 ÷ 48 = 1.08°.
The phone side needs two more. The entrance pupil is the actual focal length divided by the f number. The image scale is 206.265 × the pixel size in µm, divided by the actual focal length times the power.
Here is the trap in the phone's spec sheet. The camera is sold as a 23 mm lens at f/1.6, and the arithmetic that looks obvious gives 23 ÷ 1.6 = 14.4 mm. That number is wrong by more than a factor of two, and the word equivalent is the reason.
23 mm is a full-frame number. It is scaled to the 43.27 mm diagonal of a 35 mm frame, so the real focal length is 23 × (12.21 ÷ 43.27) = 6.49 mm. The entrance pupil is then 6.49 ÷ 1.6 = 4.06 mm, not 14.4 mm.
Where does 12.21 mm come from? The sensor is a 1/1.31 in type, and the type name is a diagonal: 16 ÷ 1.31 = 12.21 mm. The pixel data agrees. At 2.4 µm per binned pixel and 12.5 MP, a 4:3 frame measures 9.80 mm × 7.35 mm, which is a 12.25 mm diagonal.
| Eyepiece | Power | Exit pupil | Against 4.06 mm | What happens |
|---|---|---|---|---|
| 32 mm | 38× | 5.42 mm | 1.34× wider | The frame keeps 4.06 ÷ 5.42 = 75% of the beam, and the lit circle dims towards its edge |
| 25 mm | 48× | 4.23 mm | 1.04× wider | Almost matched: the lit circle stays even to its edge |
| 15 mm | 80× | 2.54 mm | 0.63× | No dark corners, but the light drops to (2.54 ÷ 4.06)² = 0.39 |
| 10 mm | 120× | 1.69 mm | 0.42× | Light drops to 0.17 of the matched case |
| 6 mm | 200× | 1.02 mm | 0.25× | Light drops to 0.06 of the matched case |
So two different things darken a phone frame, and only one of them is the pupil. The other is the field stop: the 25 mm eyepiece ends the sky at 1.08°, while the phone's diagonal covers 1.80° at 48×, so the frame's outer band falls outside the field and stays dark whatever the pupil does. Fig. 06 draws that circle.
The pupil decides the brightness inside the circle. A beam wider than the camera's pupil dims the lit disc towards its edge. A beam narrower than it costs light everywhere, and the table prices that in square. A longer eyepiece fills more of the frame with lit sky at a lower power: the 32 mm eyepiece goes from 48× to 38×.
A 2x Barlow moves four numbers at once. The exit pupil halves to 2.12 mm and the true field halves to 0.54°. The image scale halves to 0.79″ per pixel, and the light falls to (2.12 ÷ 4.06)² = 0.27 of the 25 mm case. The Moon is 0.52° across, so at 96× it reaches the edge of the field.
Three ways to put a phone on a telescope
There are three ways to put a phone on a telescope, and they differ in what reaches the sensor. The first uses the phone as a screen: you look into the eyepiece and photograph the display. Nothing is bolted on, but the sensor never sees the sky. The picture is a photo of a screen, so the detail stops at the screen's pixels and the field is whatever your eye can hold.
The second clamps the phone over the eyepiece. The camera lens sits above the exit pupil, the screen faces you, and the adapter's clamp holds the body. This is the mainstream route, and it is what the rest of this page assumes.
The third puts the phone on a ring and the ring on a tripod or on the tube. That arrangement leaves the eyepiece free and lets the phone sit still while a motor moves the telescope, which matters for planets. The cost is a longer chain between the sky and the sensor, and every joint in it is a place for the frame to shake.
| Way | What you need | In the frame | Suits | Key number |
|---|---|---|---|---|
| Phone as a screen | Nothing at all | The exit pupil and your eye | Checking the framing | Screen pixels, not sensor pixels |
| Clamp over the eyepiece | An adapter with an eyepiece clamp and a phone jaw | The sky through the exit pupil | The Moon and the planets | Barrel 22–61 mm, phone 60–87.5 mm |
| Ring on a tripod | An adapter ring, a phone holder, a tripod or tube mount | The same sky, held steadier | Tracked planet work | Joint count sets the shake |
| Eyepiece | Barrel across | Clamp adapter | Ring adapter | Phone jaw | Turns 1.25 in into 2 in |
|---|---|---|---|---|---|
| 1.25 in | 31.7 mm | Opening must exceed 31.7 mm | 1.25 in thread | 60–87.5 mm | No |
| 2 in | 48 mm | Opening must exceed 48 mm | 2 in thread, M48 | 60–87.5 mm | No |
So the first adapter is chosen in a fixed order. Start with the eyepiece: 1.25 in is 31.7 mm across and 2 in is 48 mm, so the clamp has to open wider than that. Then check the phone, because the jaw has to take the body width, and 60 mm to 87.5 mm is the range on the three-axis adapter on this page. Only after those two numbers do you look at anything else on the box.
Two things the adapter cannot fix. A 2 in focuser that comes with a 1.25 in adapter still takes a 1.25 in eyepiece. So the clamp has to match the barrel in your hand and not the focuser. The phone's mass also lands on one side of the focuser, which on a Dobsonian is the side that swings. Balance the tube before you point it at anything.
Read the focuser before the barrel. A 2 in focuser takes 2 in eyepieces straight away, and a 1.25 in focuser needs the adapter that came in the box. The clamp also decides how squarely the lens sits over the exit pupil, and that is the pupil match from the table above: an adapter that holds the phone off-axis shifts the camera's entrance pupil away from the beam, and the corners darken for a second reason.
Set the exposure by hand
Auto exposure cannot work here, and the reason is the shape of the frame. The camera meters the whole picture, which is mostly black sky, so it lengthens the exposure until the sky turns grey. Then the bright target in the middle of that frame is white.
Set the exposure for the target instead. Phones with a pro or manual mode take ISO and shutter separately, and the aperture stays fixed at f/1.6 on the camera in our example. The Moon row is the anchor: EV 15 at f/1.6 is 1/12,800 s at ISO 100, and the planet rows add the beam factor from Table 1 on top of it.
| Target | ISO | Shutter | Mode | Focus | Why |
|---|---|---|---|---|---|
| Near full Moon, no filter | 100 | 1/12,800 s | Pro, manual ISO and shutter | Manual, at infinity | The Moon's surface is about EV 15, and EV 15 at f/1.6 is 1/12,800 s at ISO 100 |
| Near full Moon, 13% filter | 100 | 1/1600 s | Pro, manual ISO and shutter | Manual, at infinity | The filter passes 0.126, so the shutter needs that factor again: 1/12,800 ÷ 0.126 ≈ 1/1600 s |
| Gibbous Moon, 40 to 60% lit | 100 | 1/12,800 s | Pro, manual ISO and shutter | Manual, at infinity | The lit surface keeps the Moon's brightness, so the exposure matches the first row |
| Jupiter's disk and moons, 10 mm at 120× | 100 | 1/2000 s | Pro, manual ISO and shutter | Manual, at infinity | The 1.69 mm exit pupil leaves 0.17 of the light: 1/12,800 ÷ 0.17 ≈ 1/2000 s at the same ISO. The moons are fainter points than the disk, so the histogram takes the final step |
| Saturn's rings, 10 mm at 120× | 100 | 1/2000 s | Pro, manual ISO and shutter | Manual, at infinity | Same beam factor as the Jupiter row; start there and let the histogram take the final step |
There is one more thing the phone does on its own. Tap focus drives the lens back and forward looking for contrast, and with a dim target it can settle on the wrong distance. Lock the focus at infinity instead, or set it by hand on the focus ring.
Three switches do more work than any accessory. Turn off night mode, because it stacks several frames and a target that moves between frames comes out with doubled edges. Turn off automatic HDR, because it merges two frames at different exposures for the same reason. And use the timer instead of the shutter button, because a finger on the screen moves the phone.
The shake has an order: finger, shutter button, horizon, then tracking. A two-second timer cuts the first two links in that chain at once, which is why a remote release earns its place. The Bluetooth shutter remote has two buttons and a 10 m range, so the frame is taken from outside the frame.
The Moon is too bright
The Moon is the brightest thing most people point a telescope at, and on a 203 mm it is brighter than the eye is comfortable with. Our reference for a comfortable disc is a 102 mm refractor with a 25% filter, set at 1.00. The 203 mm gathers (203 ÷ 102)² = 3.96 times the light of the 102 mm, and the 25% filter keeps a quarter of it, so the same disc sits at 3.96 ÷ 0.25 = 15.8 on that scale.
A 13% filter cuts that to 15.8 × 0.126 = 2.0, twice the reference. The transmission comes from T = 10^-D: ND 0.9 gives 10^-0.9 = 0.126. It is the darkest common single filter, and the 8-inch still runs twice the reference with it on. The step that lands on the reference is ND 1.2: 10^-1.2 = 0.063, and 15.8 × 0.063 = 1.0.
When do you need the filter? Judge the phase first. Near full, the disc sits at 15.8 on the brightness scale and the filter earns its thread. A gibbous Moon has the same surface brightness with less of it in the frame, so the exposure stays where it is and the filter is optional. A thin crescent has the same surface brightness again, and the empty sky around it is what stops you seeing it.
Where the filter sits matters less than people expect. The thread is at the bottom end of the eyepiece, under the glass, so a filter in that thread changes the light and nothing else. The exit pupil stays 4.23 mm, the true field stays 1.08°, and the scale stays 1.59″ per pixel.
It also adds no resolution. The 203 mm resolves about 0.57″, and the phone's pixel covers 1.59″ at 48×. The glass can do finer than the sensor can sample, so the file is softer than the telescope is good for. More power closes that gap, because the sample gets finer as the power rises.
For the phone, the filter's practical value is the ISO it gives back. Cutting the light to 12.6% is 2.98 stops. So the same disc can be shot two stops lower in ISO, and the noise on the sensor drops with it. The thread is 1.25 in, so it fits the eyepiece in the tables above. The moon filter page has the density steps and the other sizes.
Planets need a mount that tracks
The Moon is forgiving. Planets are not, because they are small and they move.
Power comes first, and our 8-inch page has the bands. Saturn's rings show at about 50×, and the Cassini Division wants 150× to 200×. Jupiter's four moons separate at 48× as points, and the belts want 100× to 180×. On this phone the 40″ disk of Jupiter at 120× spans 40 ÷ 0.64 = 63 pixels, and its moons are one pixel each.
Then tracking. On a manual alt-az mount the field slides, and it slides faster at high power. The mount page has the numbers for both mount types.
The phone's own sampling sets the other limit. At 48× one pixel covers 1.59″, while the 8-inch resolves 0.57″, so the file is about three times softer than the view through the eyepiece. The sampling improves with power: 0.95″ per pixel at 80×, 0.64″ at 120× and 0.38″ at 200×.
The phone's pixels only get finer than the glass above about 134×, and past that line the seeing is the wall instead. That is why the last few steps of power are worth more than the first ones.
The 2x Barlow is the decision that needs the arithmetic. On the 25 mm eyepiece it doubles the power to 96×, and the pixel scale halves to 0.79″ per pixel. A planet comes out twice as large in the file. The field halves to 0.54° and the exit pupil halves to 2.12 mm, so the light falls to 0.27 of the 25 mm case. The resolution does not improve, because 0.79″ per pixel is still coarser than the 0.57″ the 203 mm resolves.
So a Barlow buys size and exposure, not detail. Use it for a close planet, not for the whole Moon: at 96× the 0.52° Moon already reaches the edge of the field. The 2x and 3x choices are on the Barlow page.
What this setup cannot do
Three ceilings sit on this method, and none of them is the phone. The aperture sets the resolution limit, so 203 mm means 0.57″ and no eyepiece changes it. The sensor sets the sampling, so 1.59″ per pixel at 48×. The mount sets how long you can expose, so a manual alt-az mount ends the shot as soon as the target leaves the frame.
Deep-sky work with a phone belongs to a second stage: long exposures on a tracking mount, then stacking frames. That is a different job from this one, and it is not covered here.
If you want the sensor, the automatic finding and the finished file, that is a smart telescope. Our smart telescope page explains how they work, the buying guide compares them by spec, and the Seestar and DWARF page goes through two models in detail. On the plain telescope side, telescope types covers the refractor and Dobsonian choices.
One round with the instrument you already own is worth more than another page of arithmetic. The numbers above tell you what to point at, which eyepiece to put in the focuser, and where to set the shutter. None of those three ceilings is about the phone being a phone. They are the aperture, the sensor and the mount, and they are the same ceilings a camera sits behind.
Common Questions
Can a phone be used as a telescope?
As the sensor at the end of an eyepiece. The magnification comes from the telescope, and the phone's job is to record what the eyepiece projects. On the 25 mm eyepiece at 48× the Moon fills 0.52 ÷ 1.08 = 48% of the field, and the phone's 4.06 mm entrance pupil decides how evenly that lit circle is lit.
Should I buy a 1.25 in adapter or a 2 in one?
Match the eyepiece, not the focuser. A 1.25 in barrel is 31.7 mm across and a 2 in barrel is 48 mm, so the clamp has to open wider than the barrel you own. A 1.25 in adapter does not turn into a 2 in one, and the other direction does not work either. The eyepiece page starts from the same two sizes.
Why are the corners of my photo black?
Two causes, in this order. The field stop comes first: the 25 mm eyepiece ends the sky at 1.08° and the phone's diagonal covers 1.80° at 48×, so the frame's outer band sits outside the field. Inside the lit circle the pupil takes over: on the 32 mm eyepiece the exit pupil is 5.42 mm against the phone's 4.06 mm, so the lit circle dims towards its edge. A longer eyepiece evens it out at a lower power.
What can a phone actually record?
The Moon and the planets are what this page works through. The 203 mm resolves about 0.57″, while the phone samples 1.59″ per pixel at 48×, so the file is softer than the view through the eyepiece. The phone's pixels only get finer than the glass above about 134×, which is where the 8-inch page puts the interesting planet work.
Should I use night mode?
No. Night mode stacks several frames, and a target that moves between them comes out with doubled edges. Automatic HDR merges two exposures for the same reason. Set ISO and shutter by hand in the pro mode, and use the two-second timer so no finger touches the phone.
Is an adapter worth it, or should I buy a camera?
If the telescope is already yours and the targets are the Moon and the planets, the adapter is the smaller project and the pupil arithmetic on this page tells you which eyepiece to use with it. If you want tracked deep-sky frames or files that come out finished, that is a smart telescope, and the smart telescope page explains what changes.
Read next
- TelescopesWhat a smart telescope is
- TelescopesTelescope types compared
- What you can seeWhat an 8-inch telescope shows
- EyepiecesMoon filters and densities
- EyepiecesBarlow lenses, 2x and 3x
- EyepiecesHow to choose telescope eyepieces
- TelescopesAlt-az against equatorial mounts
- ToolsEyepiece field of view calculator
- ToolsTelescope magnification calculator
- What you can seePick a telescope by aperture
Sources
- Formulas: exit pupil = eyepiece focal length ÷ focal ratio; true field = apparent field ÷ power; entrance pupil = actual focal length ÷ f number; actual focal length ≈ equivalent focal length × (sensor diagonal ÷ 43.27 mm); sky angle = 2 × arctan(sensor dimension ÷ 2 ÷ actual focal length); image scale = 206.265 × pixel size (µm) ÷ (actual focal length × power); light ratio = (exit pupil ÷ entrance pupil)²; filter transmission T = 10^-D. Method: How we research.
- Xiaomi 14 listing: Light Fusion 900 sensor, 1/1.31 in sensor size, 23 mm equivalent focal length, f/1.6, 50 MP with 2.4 µm 4-in-1 pixels, read 2026-11-06 through the selection tool. The 12.21 mm diagonal and the 9.80 mm × 7.35 mm frame are derived from those figures, and the 43.27 mm full-frame diagonal is the reference used by our calculators.
- tridaptor listing: eyepieces 0.86 to 2.4 in (22 to 61 mm), phones 2.36 to 3.44 in (60 to 87.5 mm), aluminium body, 1 piece, read 2026-11-06.
- CamKix listing: small button for Android, large button for iPhone, on and off switch, 30 ft (10 m) range, 1 piece, read 2026-11-06.
- Explore Scientific 1.25 in ND 0.9 listing: 13% transmission, 1.25 in thread, 1 piece, read 2026-11-06.
- Reference instrument: 203 mm aperture, 1,200 mm focal length, f/5.9, and the 52° apparent field of a 25 mm Plössl, as published on our 8-inch page and our eyepiece page. The Moon at 0.52°, the Dawes limit of 0.57″, Saturn's rings at 50× and the Cassini Division at 150× to 200× come from the same 8-inch page.
- Exposure reference: the full Moon's surface brightness is about EV 15, the same as a sunlit grey card, and at f/1.6 that is 1/12,800 s at ISO 100.
- Barrel sizes: 1.25 in measures 31.7 mm across and 2 in is M48 × 0.75, so 48 mm, as published on our moon filter page; the two barrel choices themselves are on our eyepiece page.
How we check numbers: How we research.